When
Availability
Your calendar. Fill the dates you can go, check how you can respond, then click Confirm Availability.
Disaster Cycle Services · Volunteer Connection
Two boxes. Both matter. One without the other leaves planners guessing.
Availability is when you can go — your dates. Intent is how you prefer to serve — home, drive, fly, or virtual. Availability is not Intent.
When
Your calendar. Fill the dates you can go, check how you can respond, then click Confirm Availability.
How
Your assignment style. Click the faint gray Edit button, set intent on each GAP — Primary counts — then Save and Confirm Responder Intent.
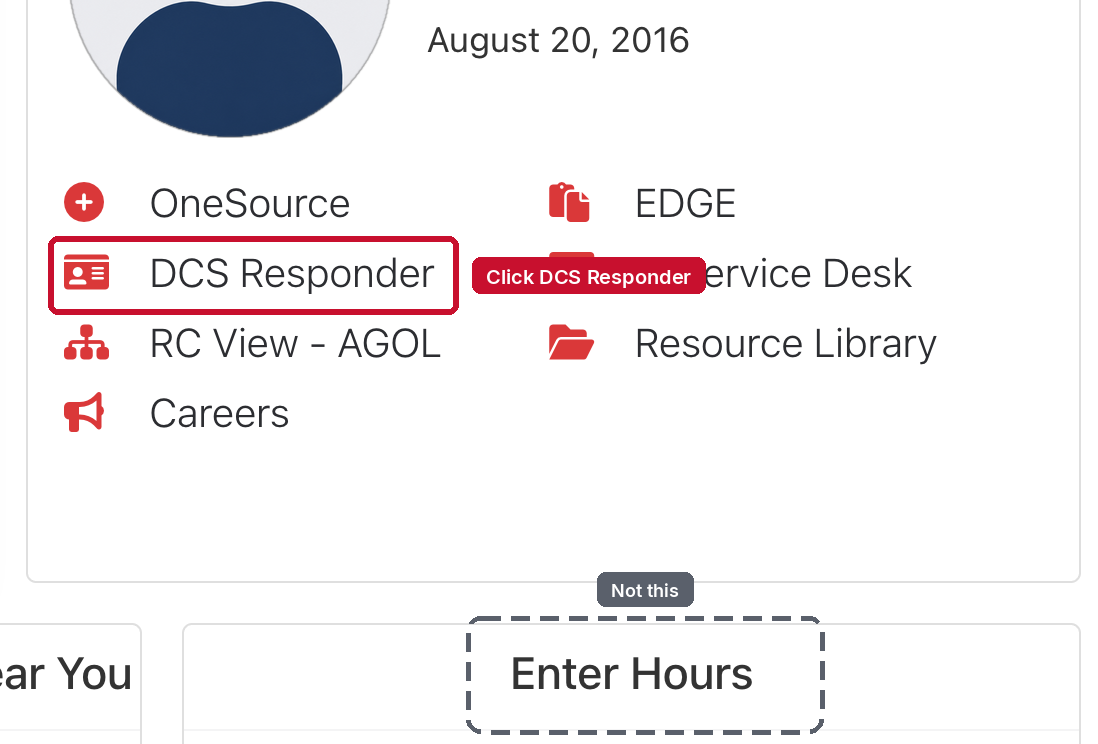
Sign in to Volunteer Connection. On the home widget, open DCS Responder. That is the door to both cards.
Look for the red badge icon labeled DCS Responder. Do not use Enter Hours. That is a different task.
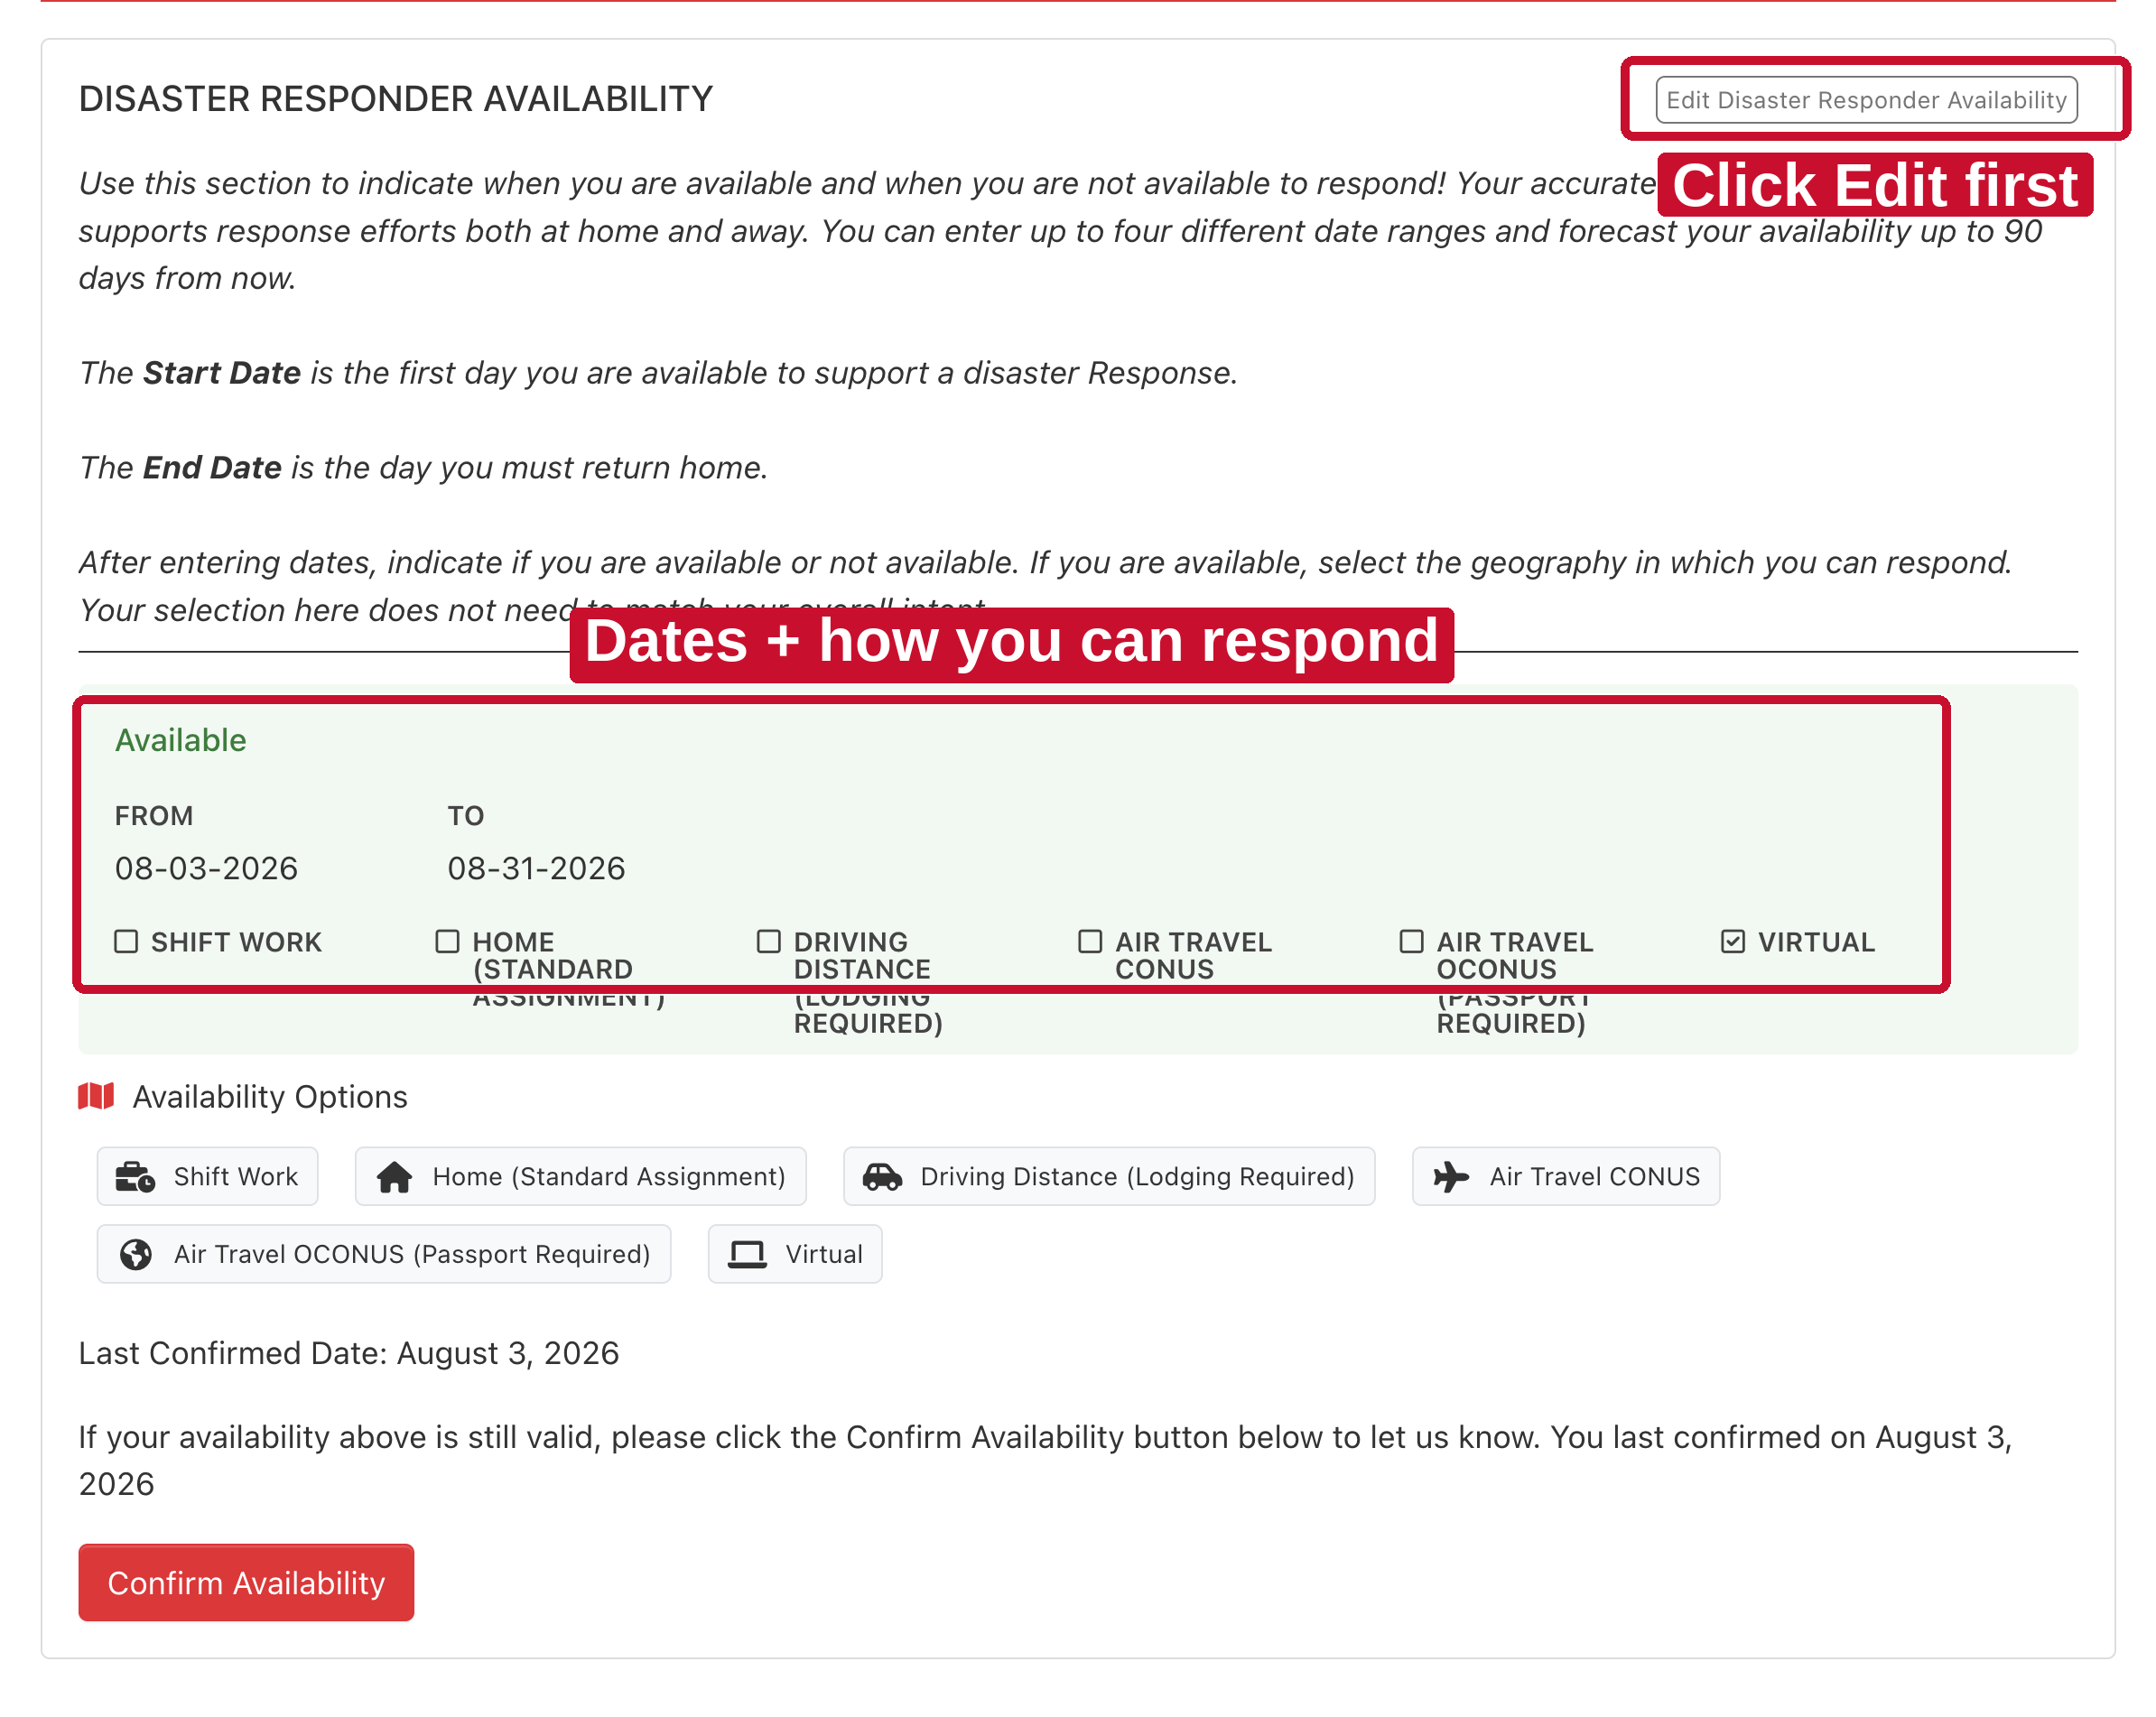
This is the Disaster Responder Availability card. It is your dates, not your assignment style. You can forecast up to 90 days out.
Start Date is the first day you can go. End Date is the day you return home. Check every box that fits — Shift Work, Home, Driving Distance, Air Travel CONUS, Air Travel OCONUS, or Virtual.
Click the red Confirm Availability button. The Last Confirmed Date updates. That is how you know the dates stuck.
Confirm Availability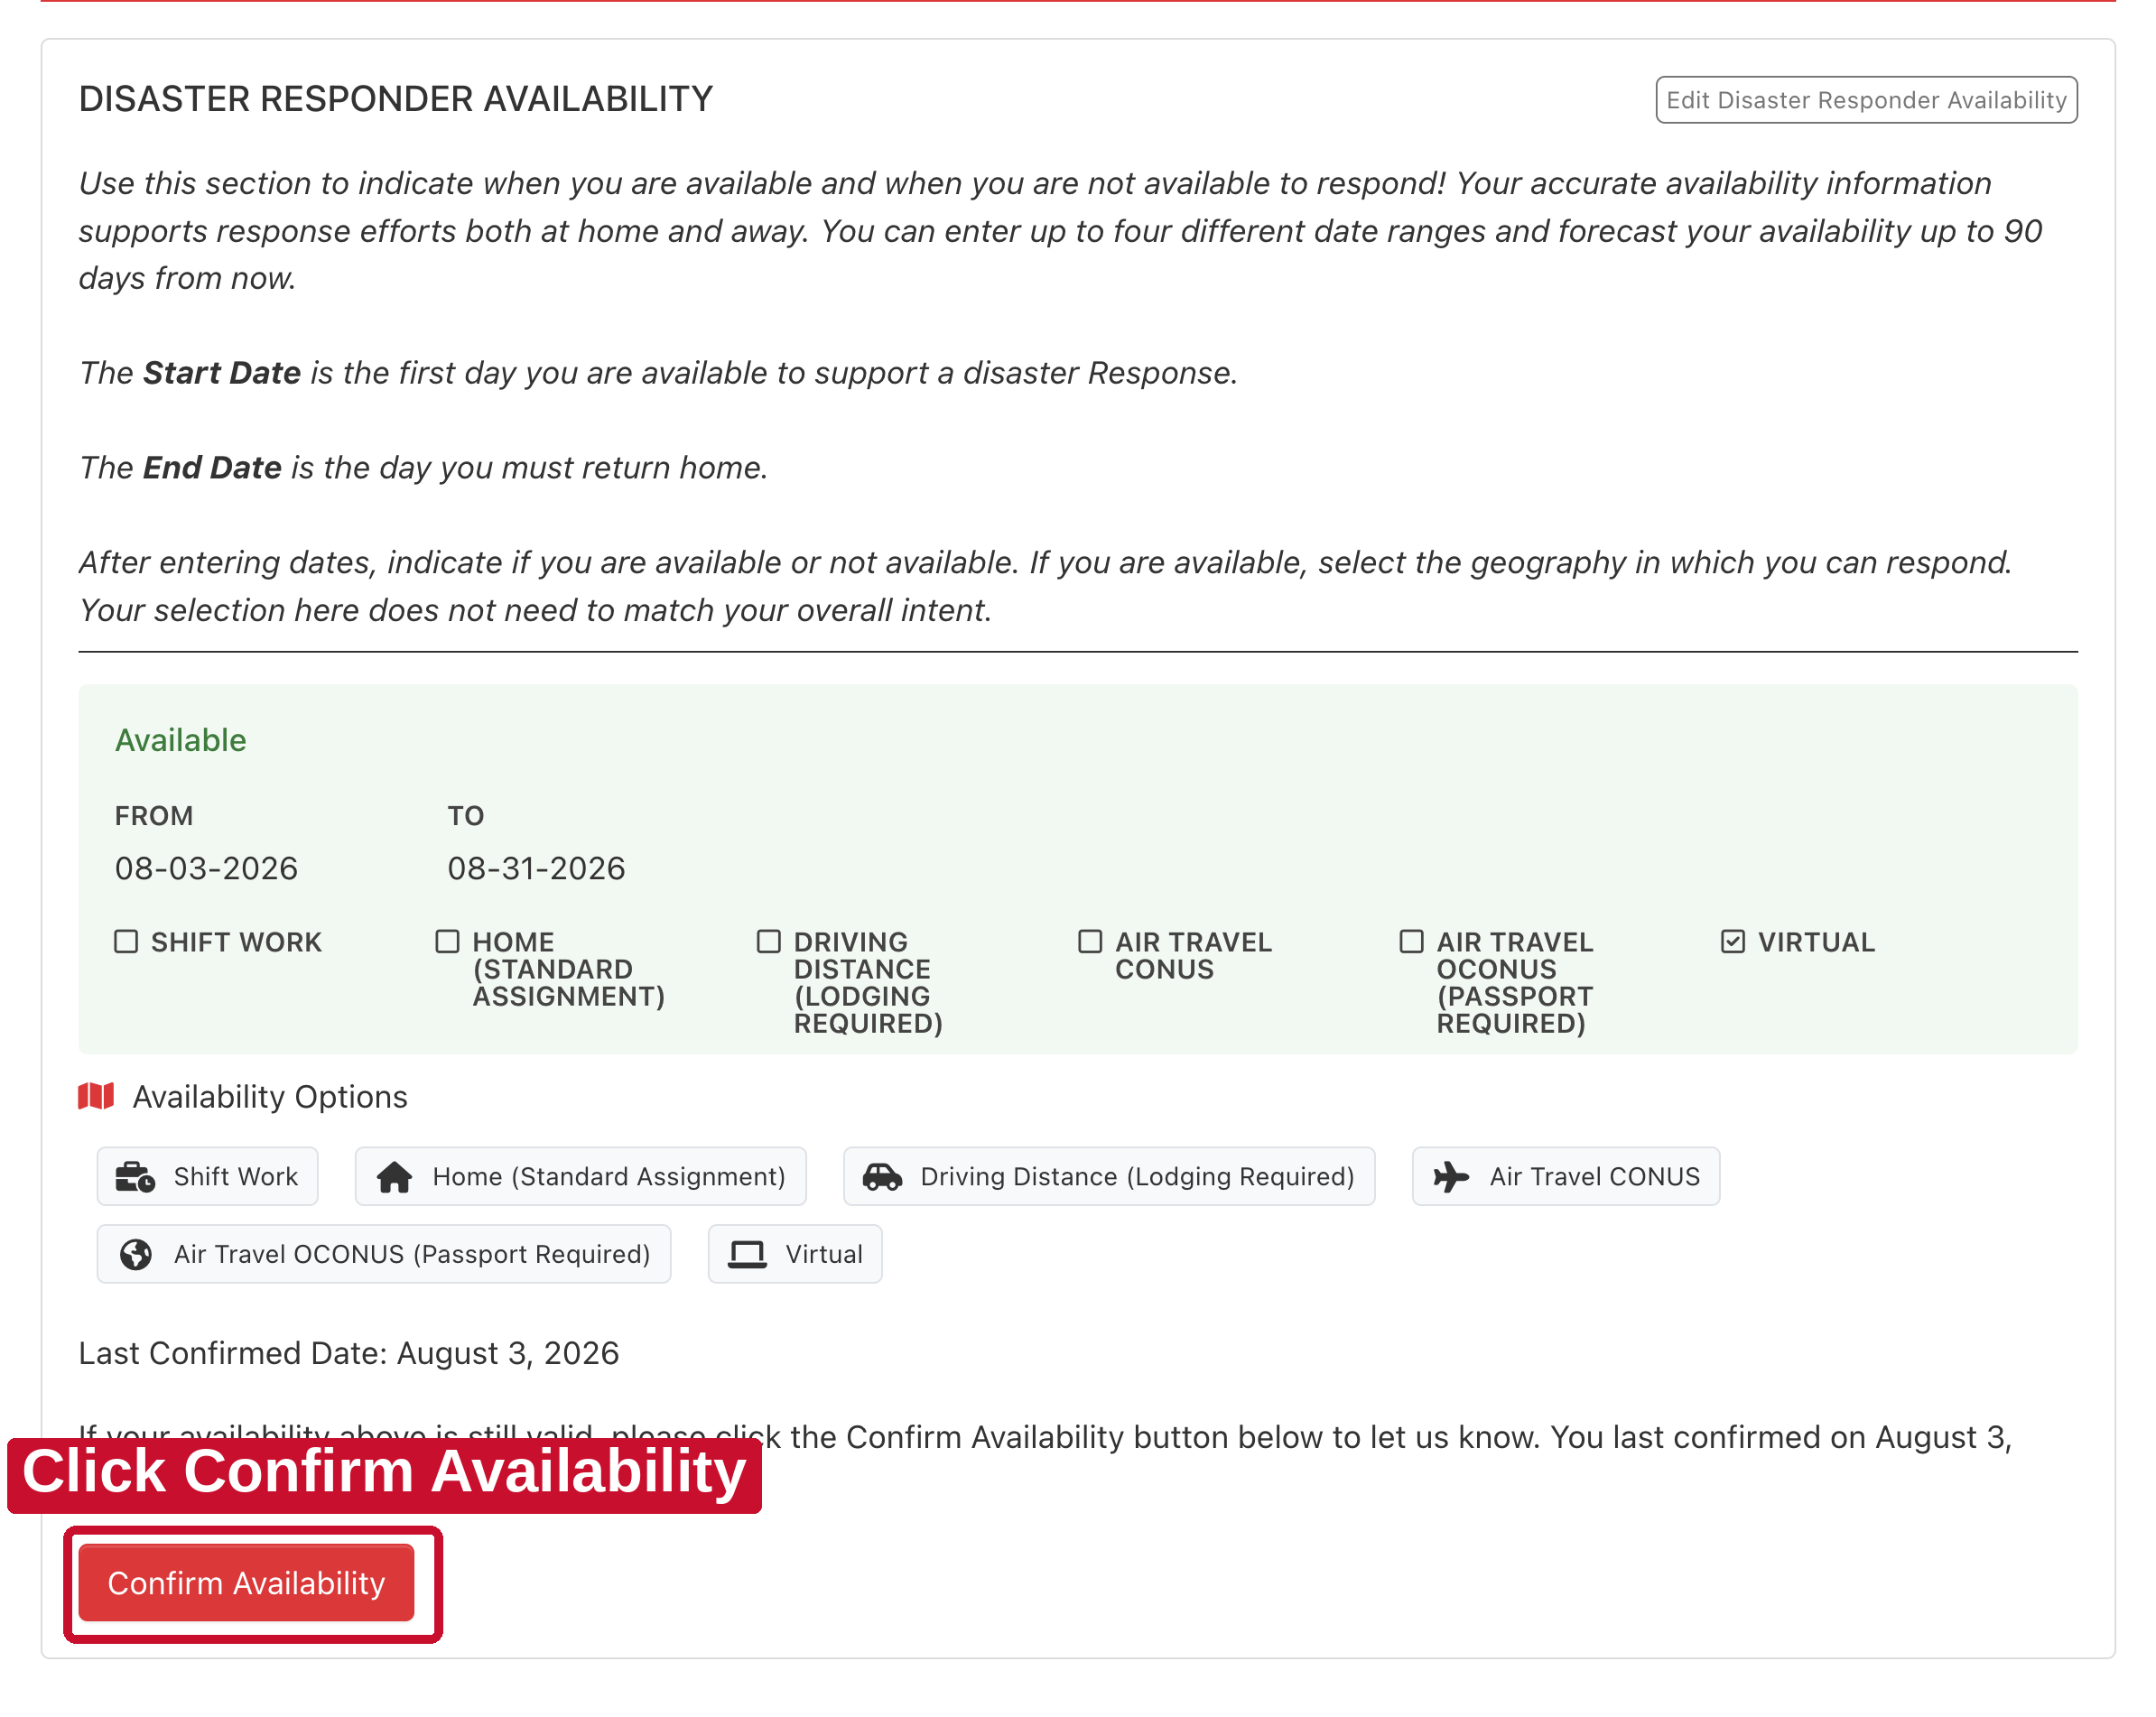
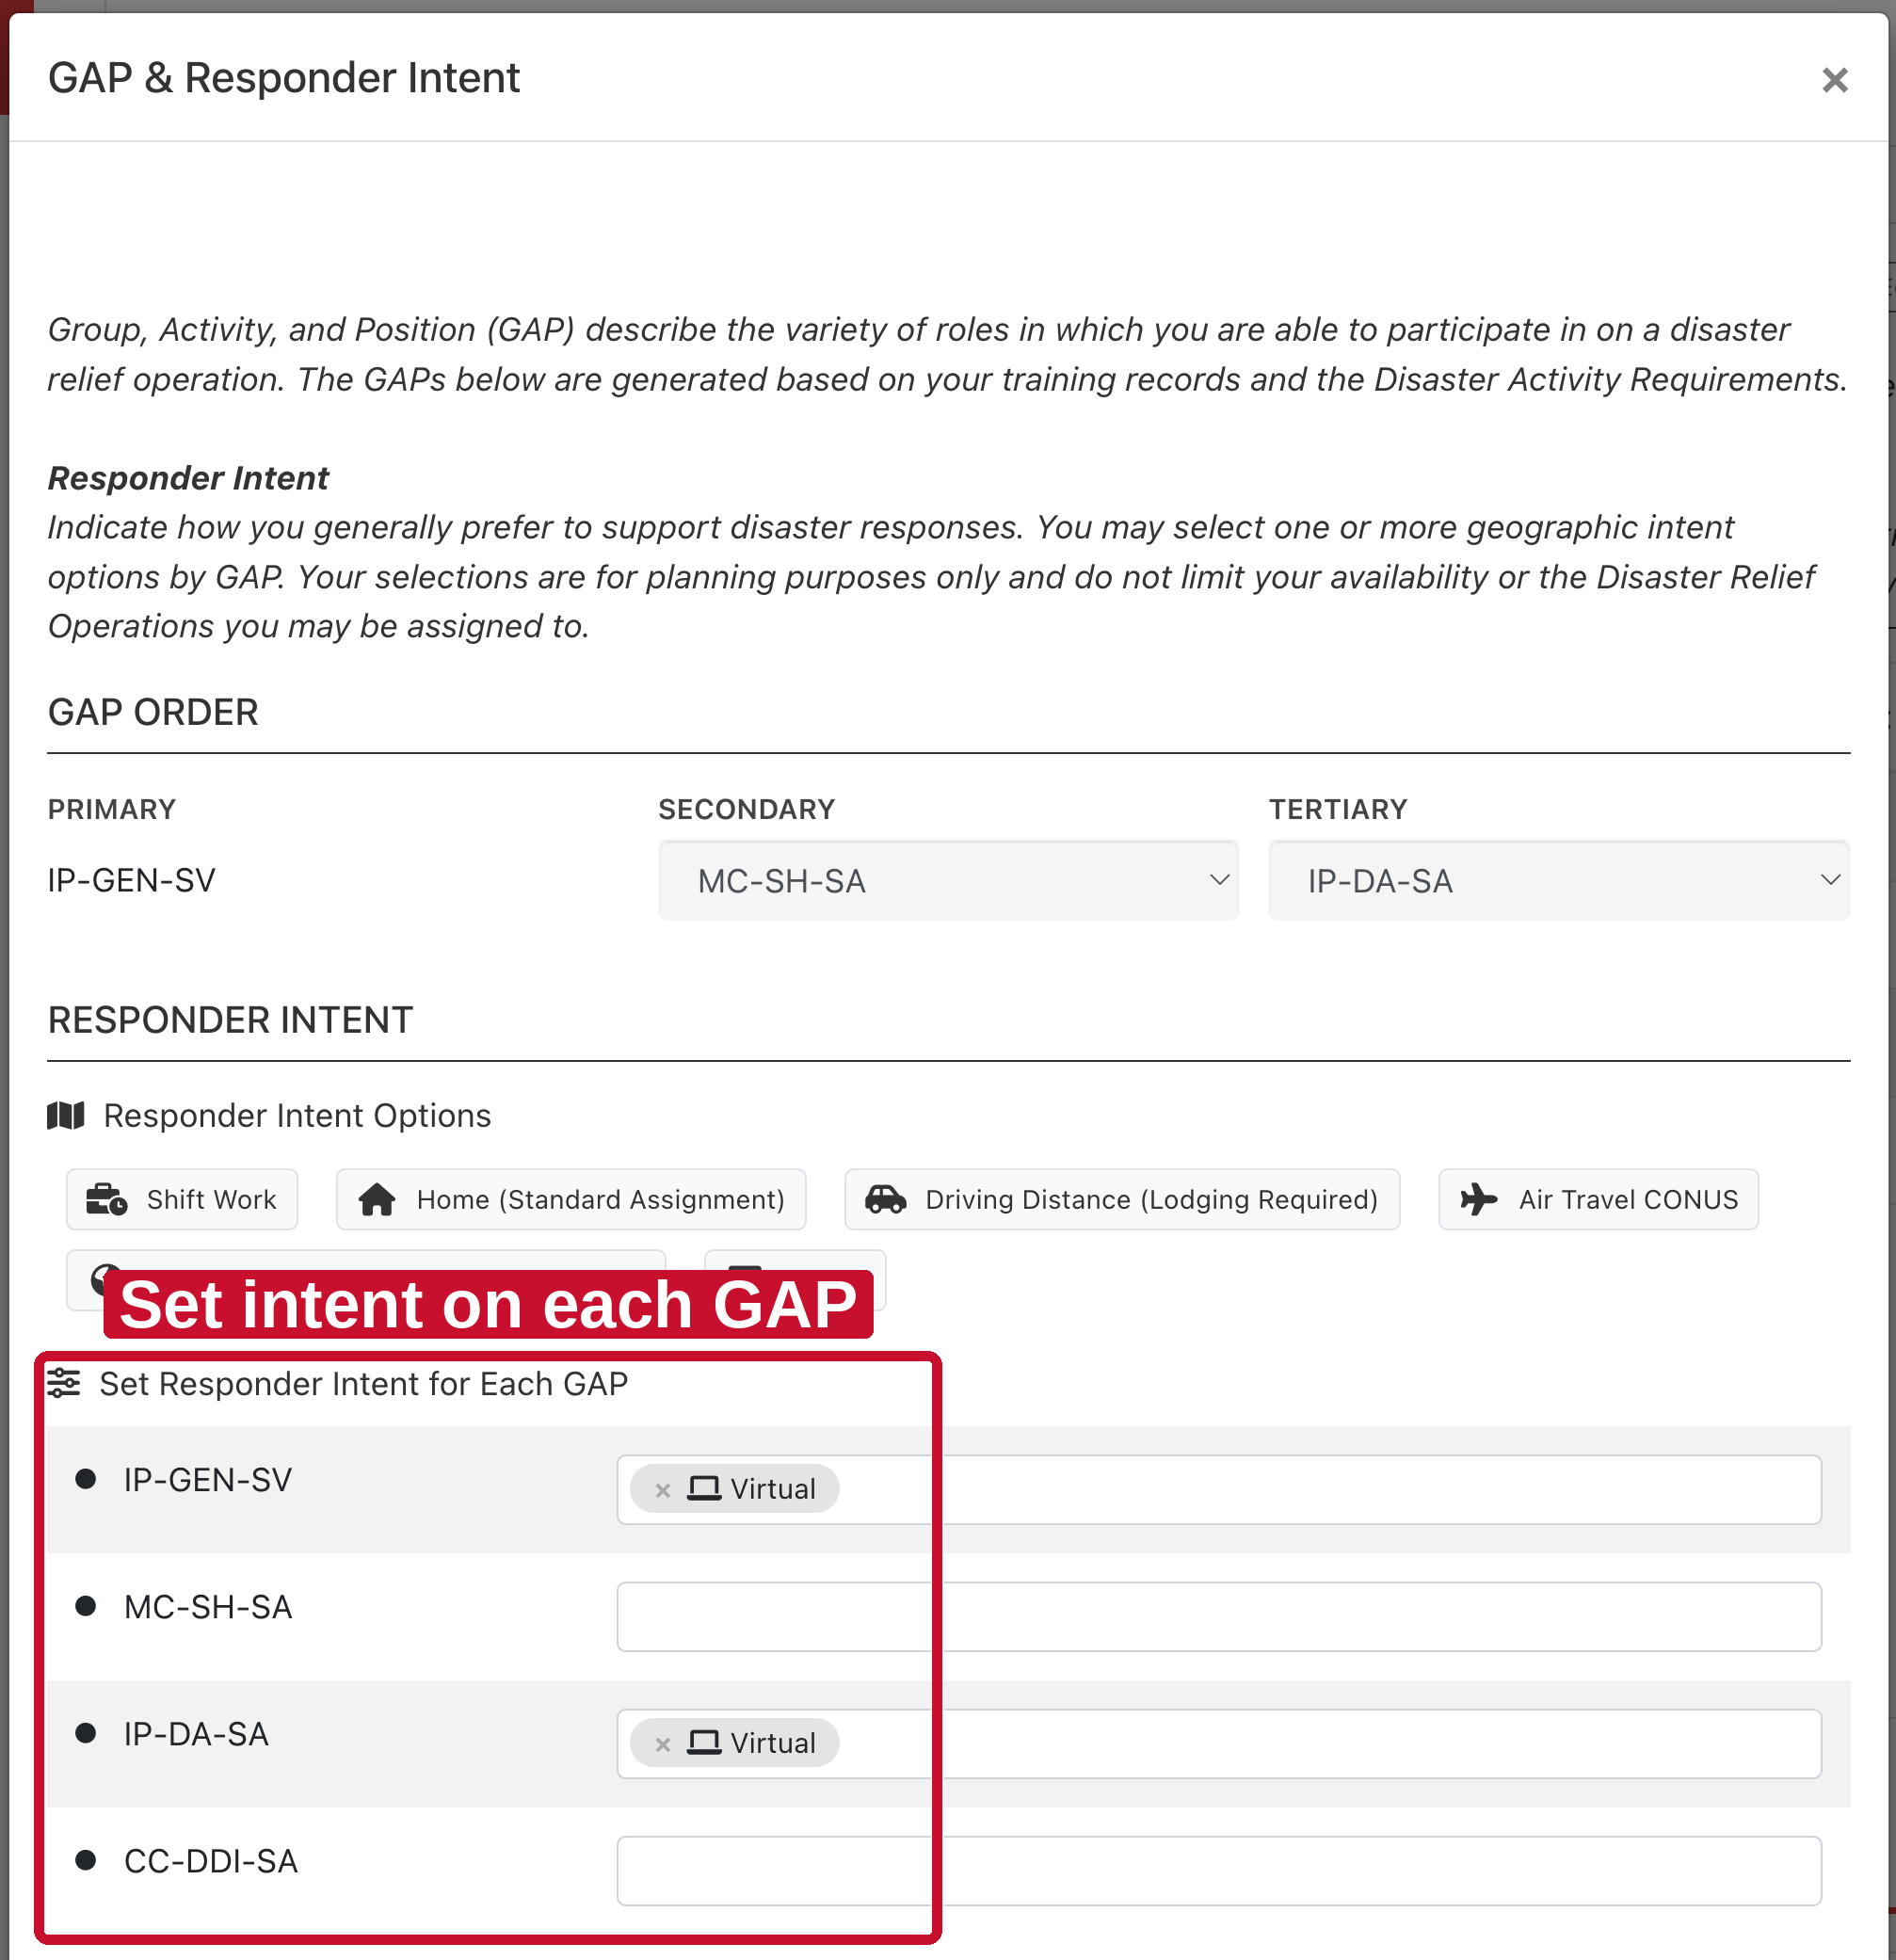
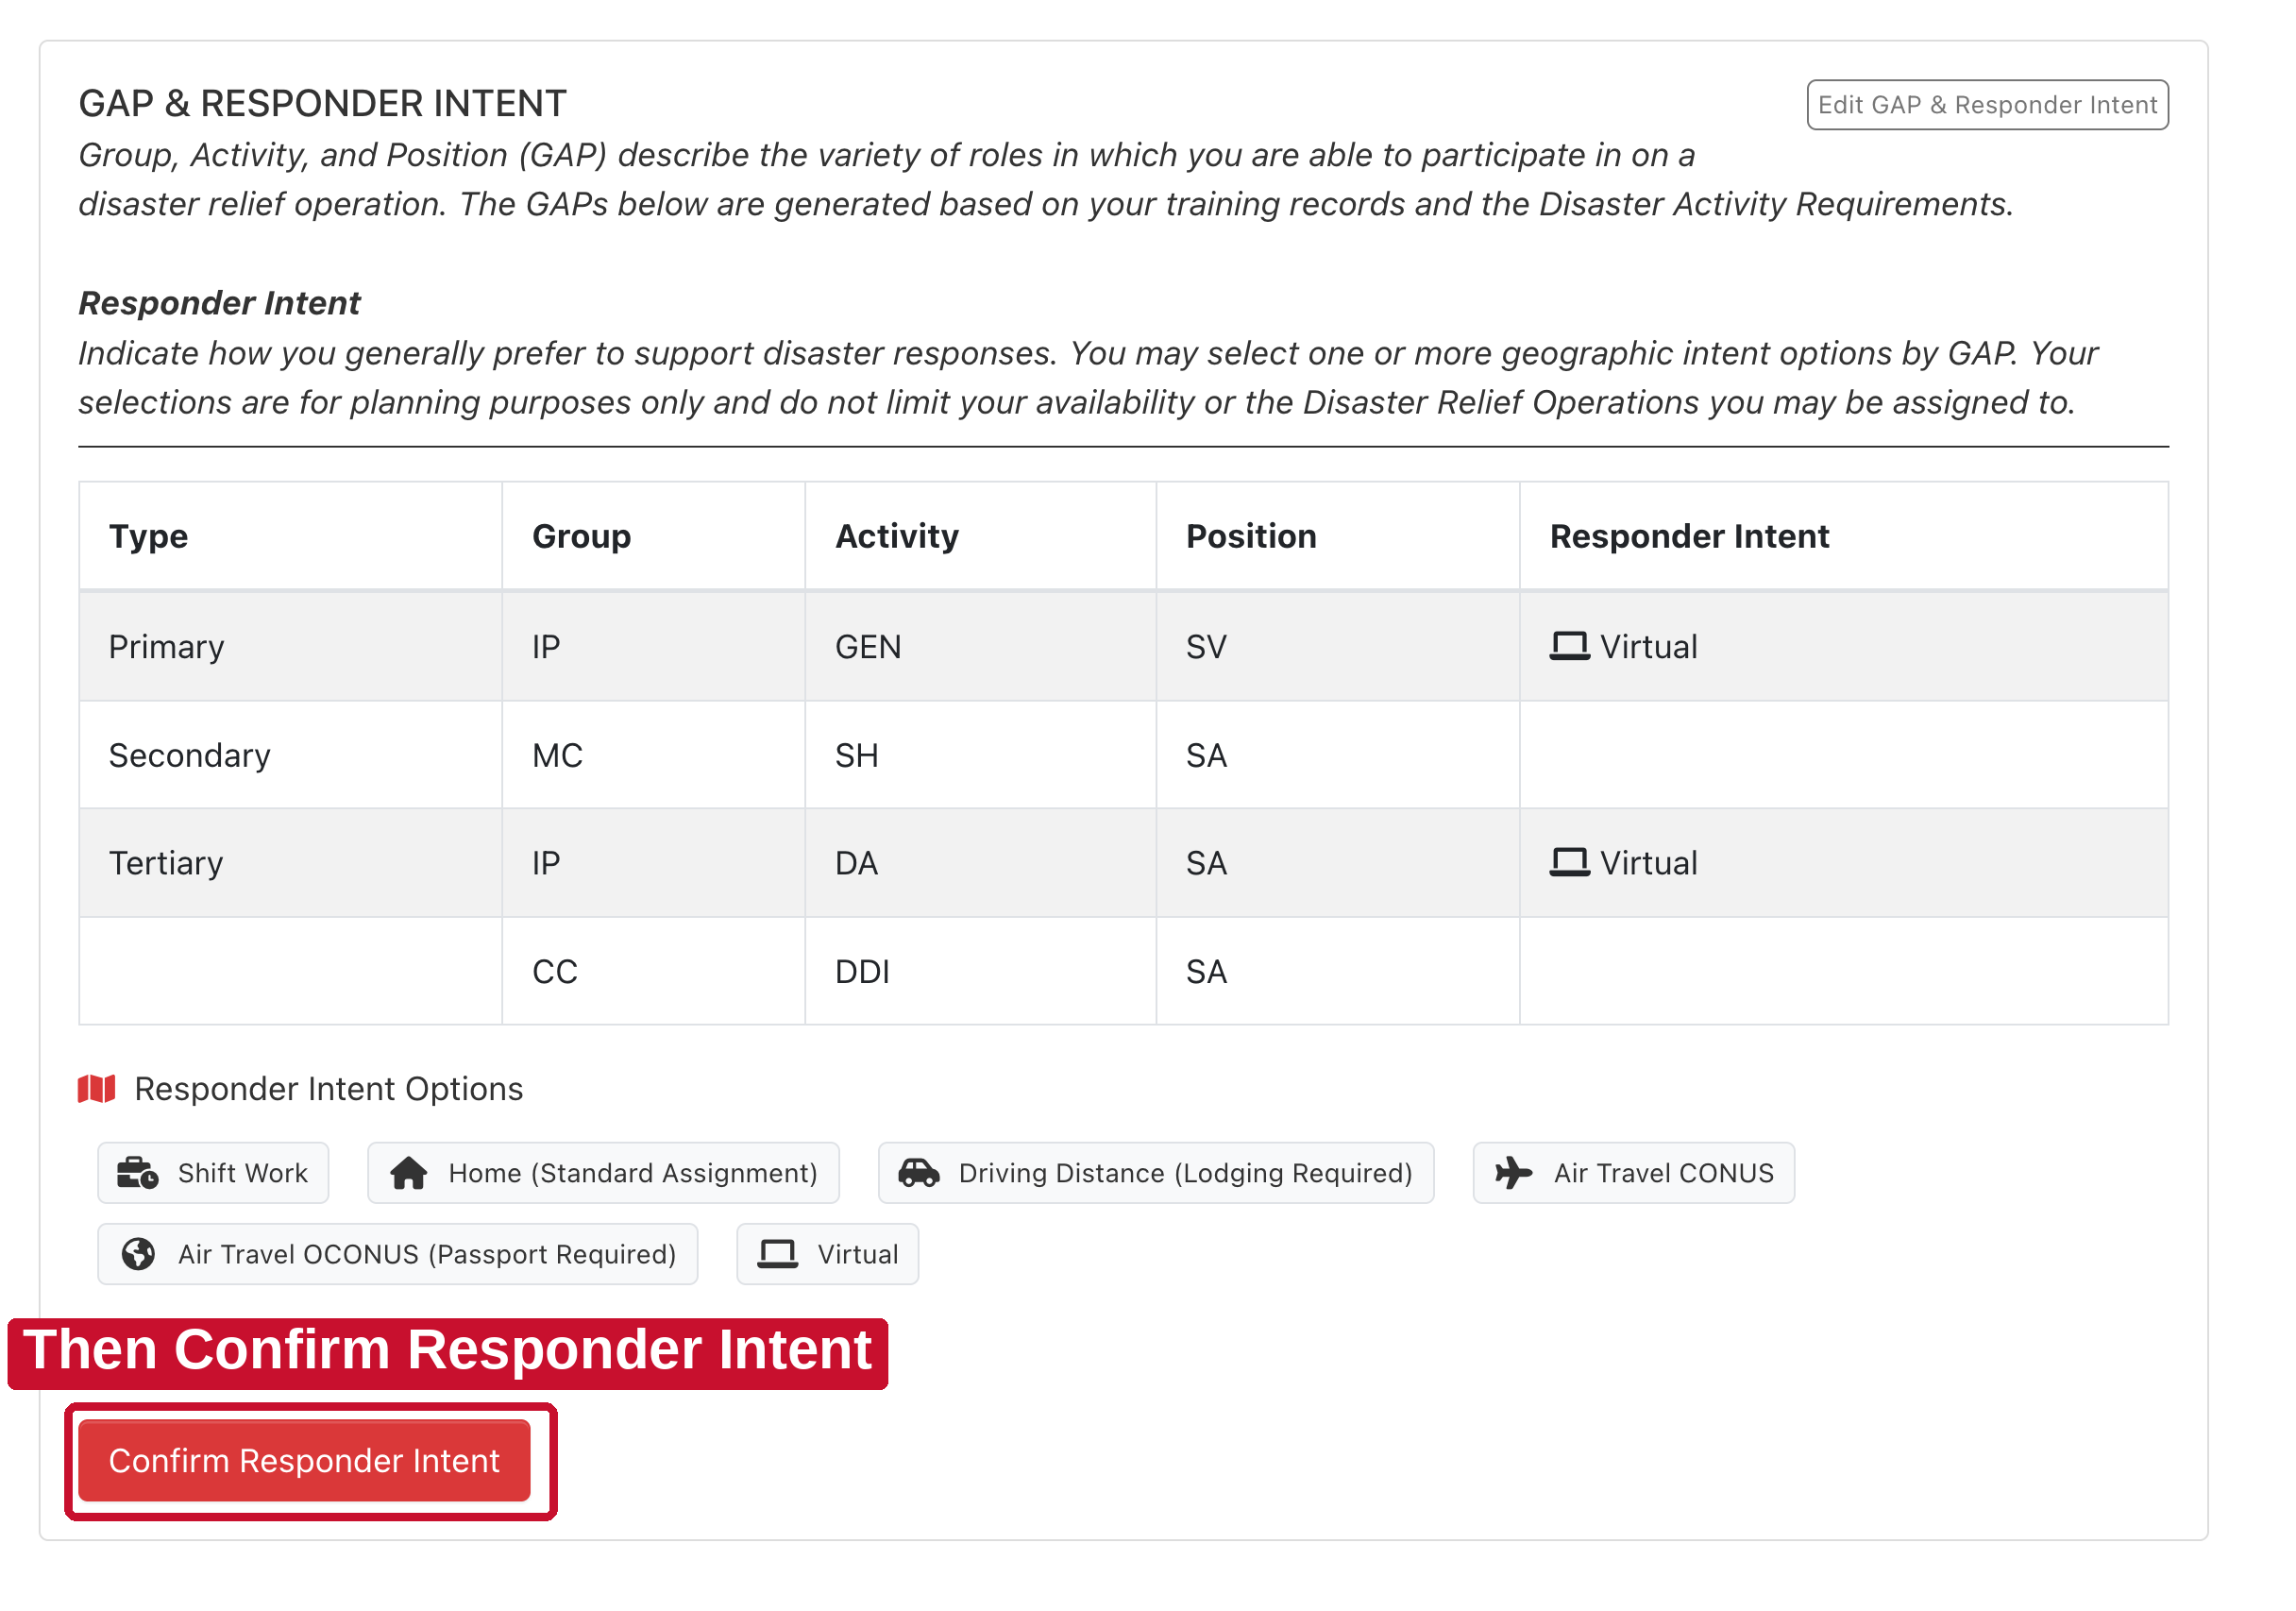
This is the GAP & Responder Intent card. GAP means Group, Activity, and Position — the jobs you are trained for. Responder Intent is your preferred assignment style. It does not limit where you can actually be assigned.
It is a faint gray button in the top-right corner of the card. Easy to miss. Most people stop here.
Edit GAP & Responder Intent Most people stop here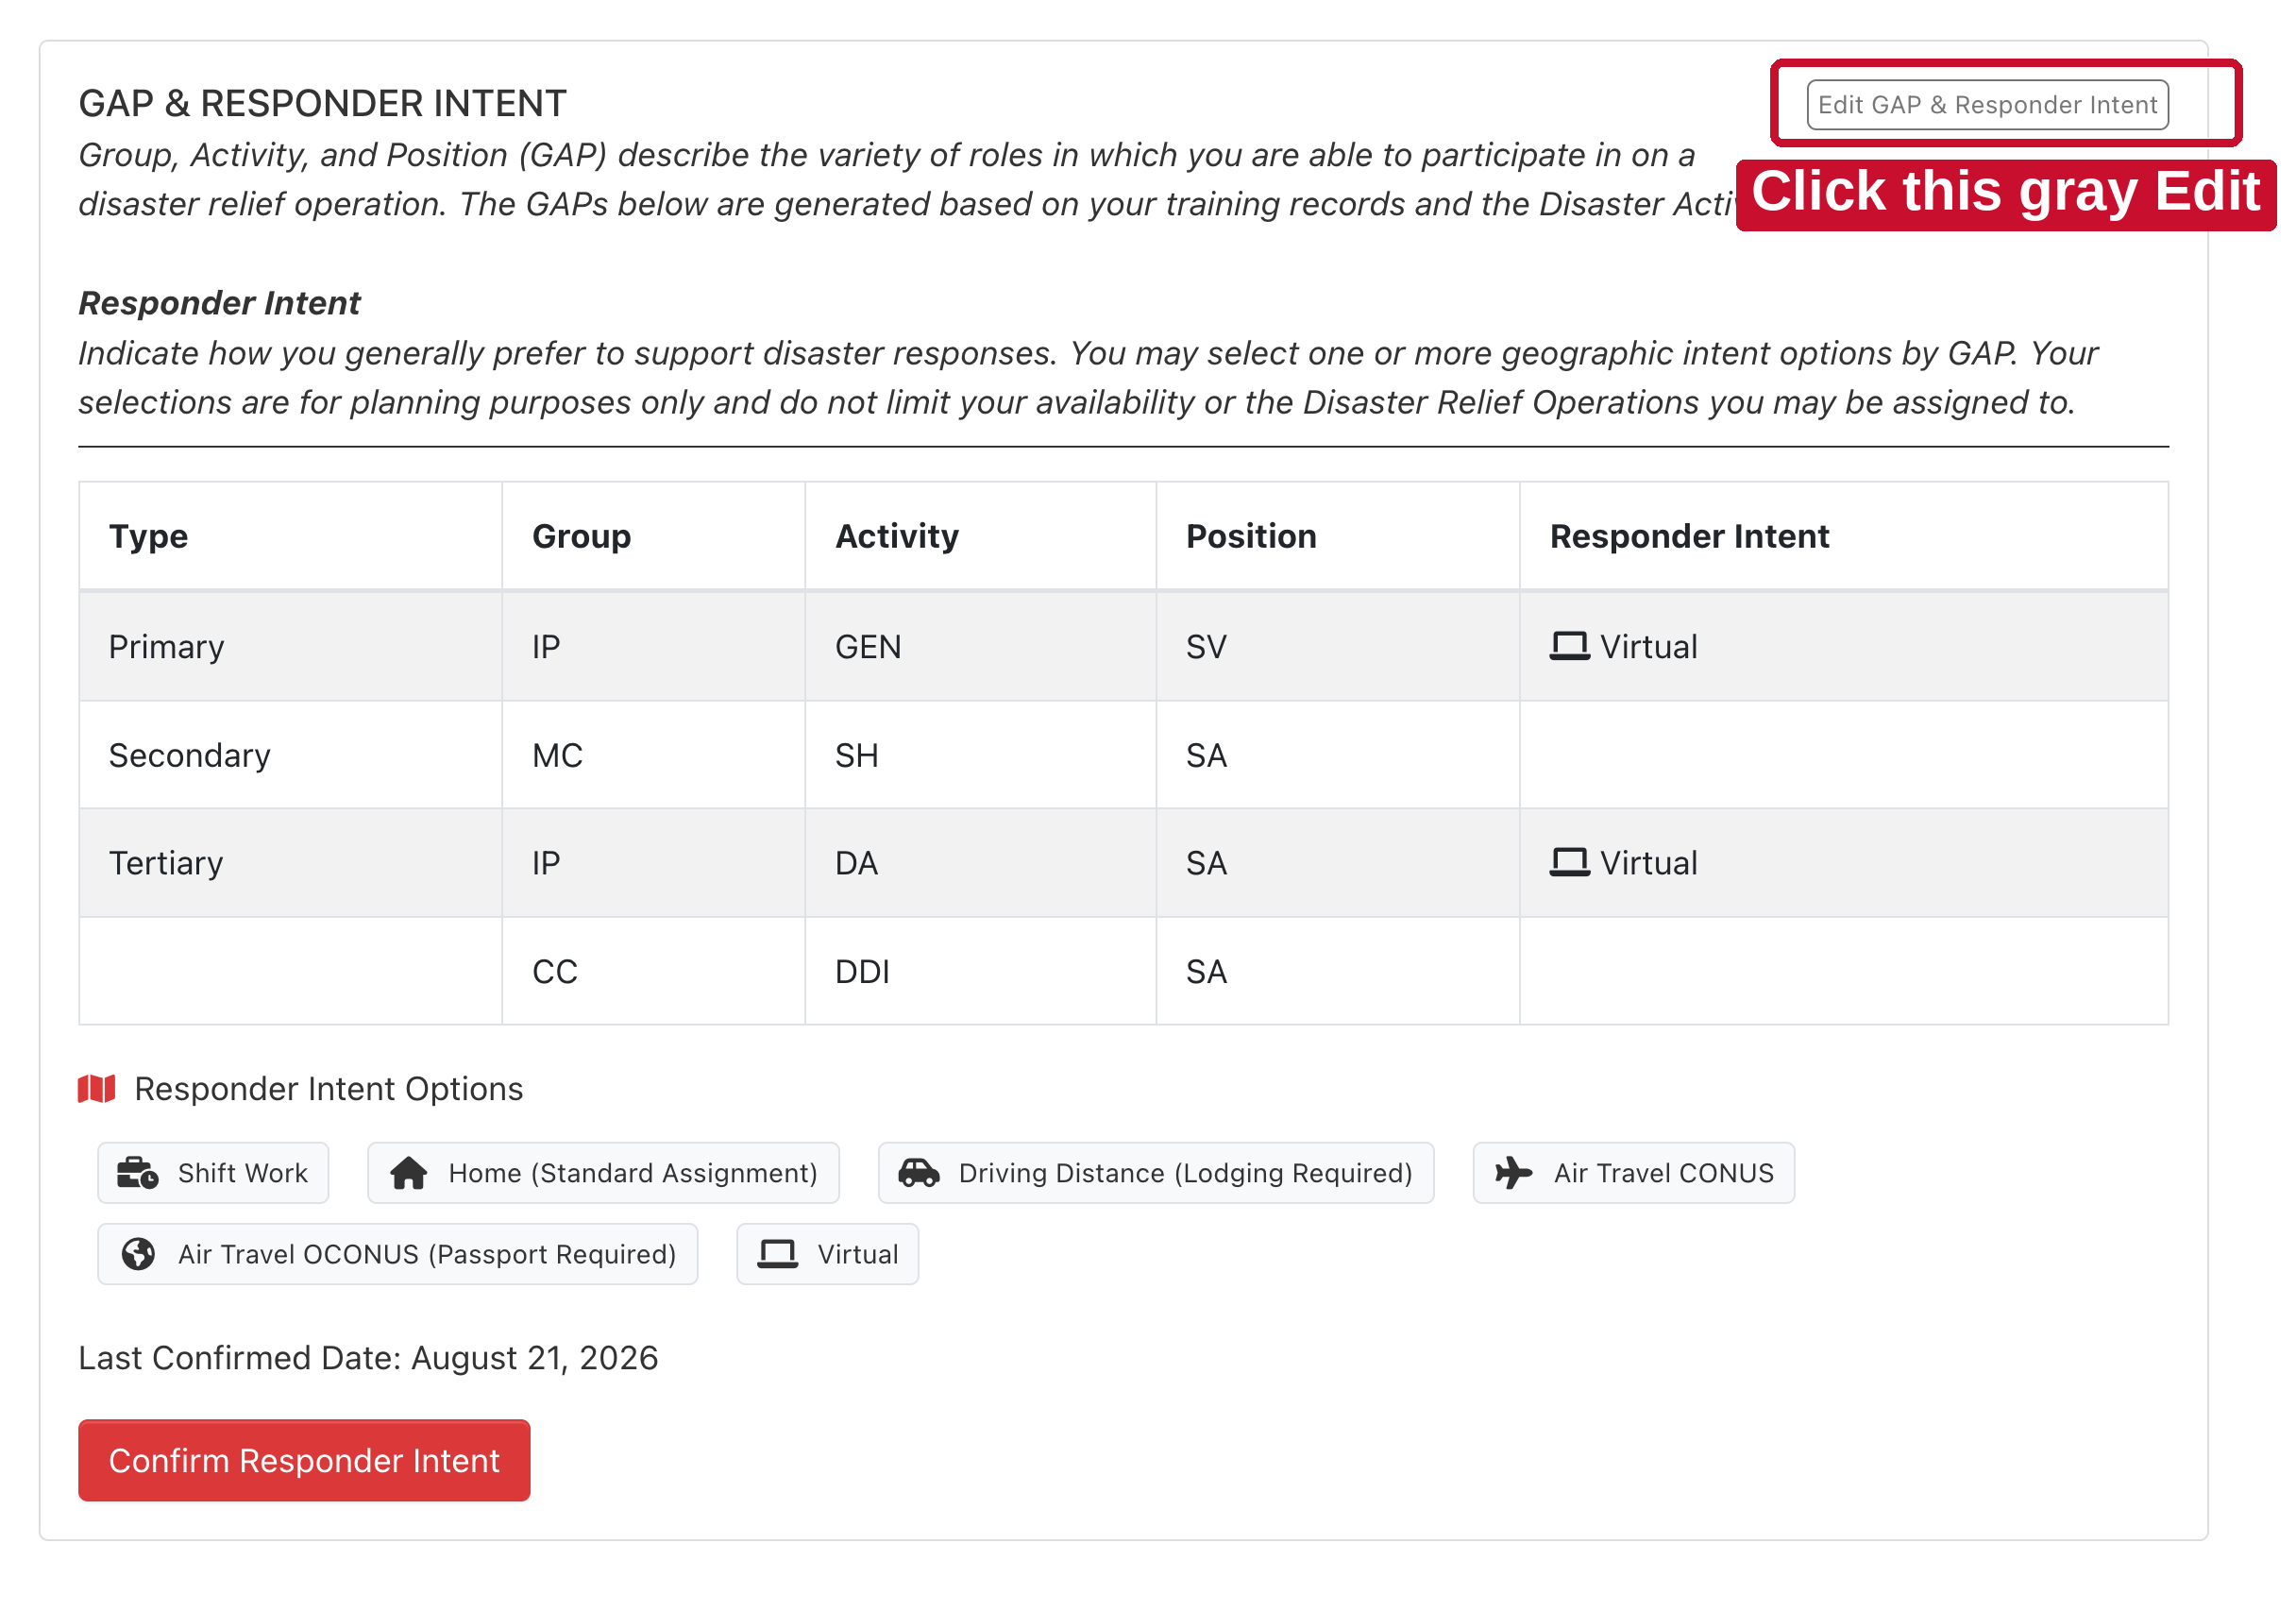
Under Set Responder Intent For Each GAP, click the box next to every job and pick one or more styles. Your Primary GAP is the one the campaign counts.
The red Save button is at the bottom of the window. Then, back on the card, click Confirm Responder Intent. Today’s date appears as Last Confirmed Date — that is how you know it worked.
Save Confirm Responder Intent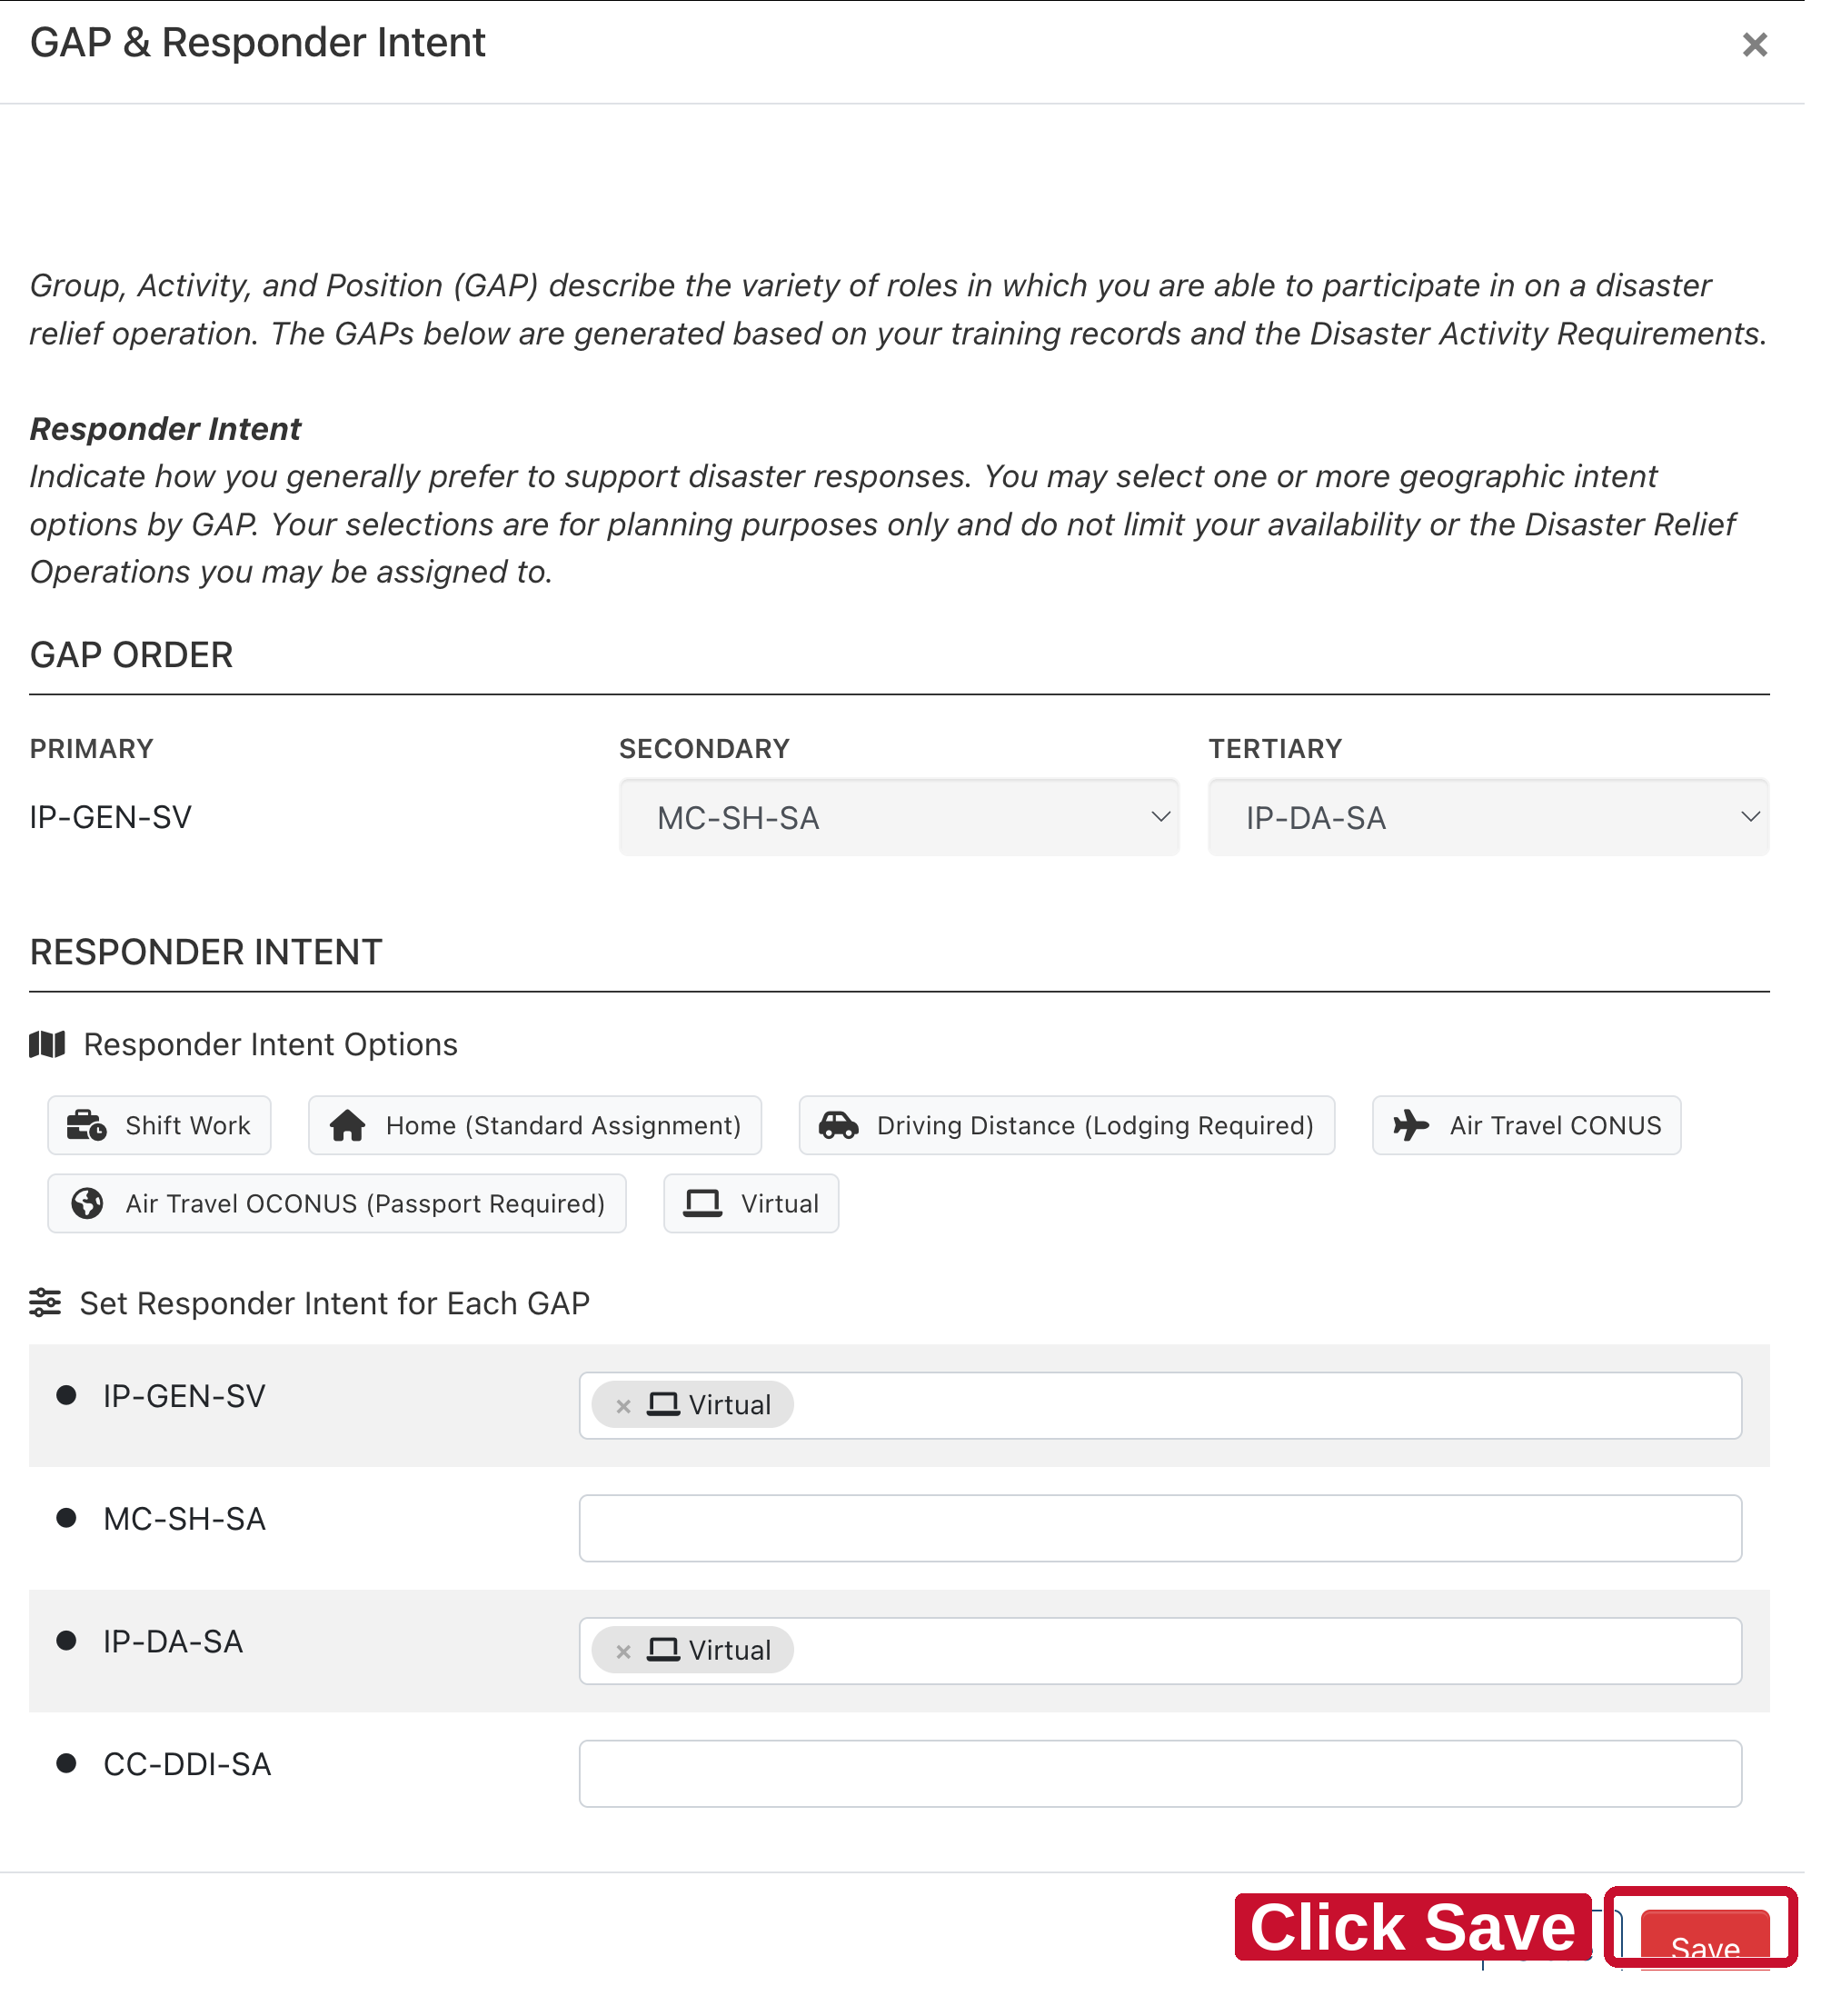
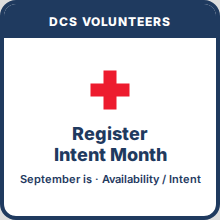
September is Register Intent Month. Disaster Cycle Services (DCS) volunteers. Copy a banner and paste it into Classic Outlook. Optional: select the picture → add a hyperlink to Volunteer Connection. The PNG itself has no URL.


Mac: Outlook → Settings → Signatures. Windows: File → Options → Mail → Signatures.
Copy Image or Download PNG above. Open Classic Outlook signatures, click in the box, then paste — or Insert → Pictures.
PasteClick the banner so the handles and border show. The link goes on the picture, not on the PNG file.
Select Picture
With the picture selected, open the link box.
Insert HyperlinkPaste the DCS Responder page. Then OK.
Paste This URLLeave it on your default signature so new mail carries it.
Default Signature